So, you want to add a little Bass to your "non-dsp" audio system? And you want to do it for around $300? Well, you have come to the right site.
Parts List:
- Infinity Basslink Enclosed Subwoofer (SoundDomain.Com $259.00 plus shipping $272.90)
- Monster Basic Amplifier Hookup Kit (Any local auto stereo store $30)
- Mounting screws for Sub brackets
- Radio Shack (Tap-In Squeeze Connectors - Cat. No. 64-3053 22-18 awg) ($3.00)
- Wiring Diagram / Color Code
Get
Organized
Organize your tools, wires, subwoofer, instructions and notes before doing anything. Don't rush this project, just take your time and you'll be happy with the results.

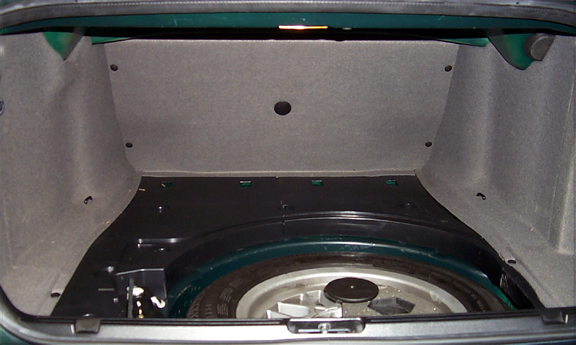
Survey your trunk
Determine the best mounting location for you because if you ask three experts what they think , you will get three different answers. (Mainly be careful not to drill through anything dangerous)
Choose a mounting location that doesn't interfere with your cd changer, spare tire, battery, fold down seats or trunk lid.
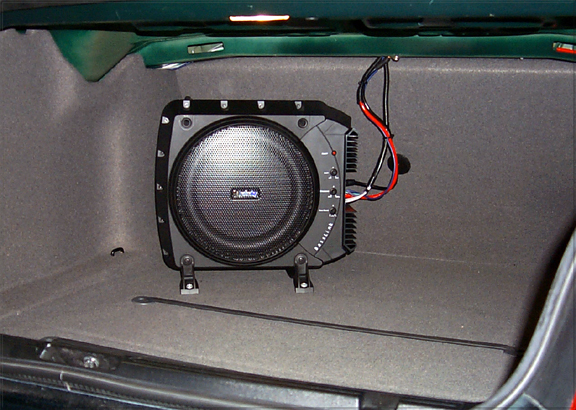
I personally opted for the "corner placed/loaded" subwoofer approach in an attempt to get as may reflections in phase (rear seat, floor, side walls). This suggests that no path is more than a 1/4 of a wavelength longer than the direct path. (sort of...)
The most difficult part of this project is making a decision on where to mount your subwoofer. Think it through.
Determine which wiring application you
want to use
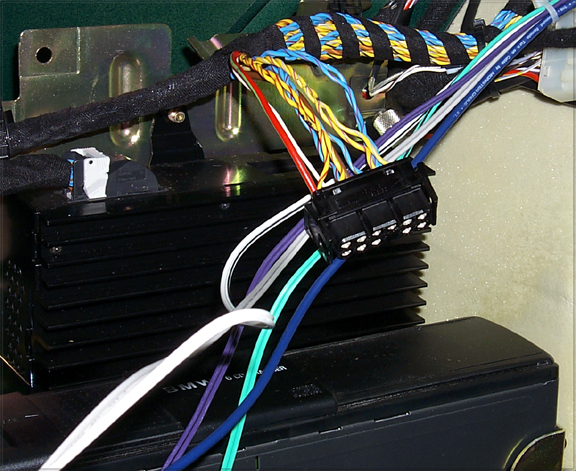
I selected Figure 9. (BassLink audio connections for a head unit equipped with four speaker-level outputs) from the installation manual. I made this decision based on tapping only the 12 Pin connector shown in this diagram versus hacking into both connectors for speaker level output. (If you want line level output you will need to tap into the 26 pin connector)
Note: All of the woofers in your car are wired to this connector.
Now having said that, line level is usually my preferred choice but since we're dealing with a Class D amp and low frequencies I opted for speaker level and less hassel.
Note: The main wiring harness is held on with slip tie wraps, just pull forward (toward you) and lift up. The tie wrap should open right up then move the harness forward for easier access.
Route your Wires
Check out this web site for more audio details and wire routing guidelines: Wiring
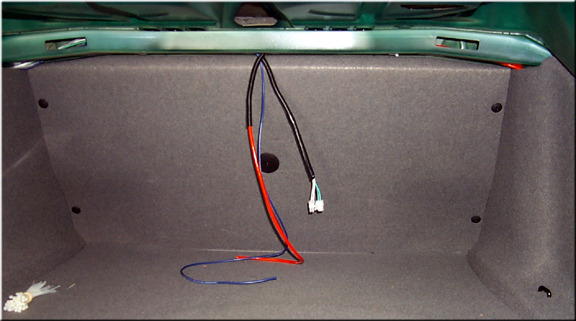
Tap-In Squeeze Connectors
(Don't hack them - Tap them)
I prefer to use this wiring diagram and color code for any "tapping" work. Wiring Diagram / Color Code
All you need to do here is "tap-in" the proper connections from your subwoofer illustrated in Figure 9. on page 5 of your installation manual to the appropriate wires on the 12 pin connector. The above diagram link makes it pretty easy to understand.

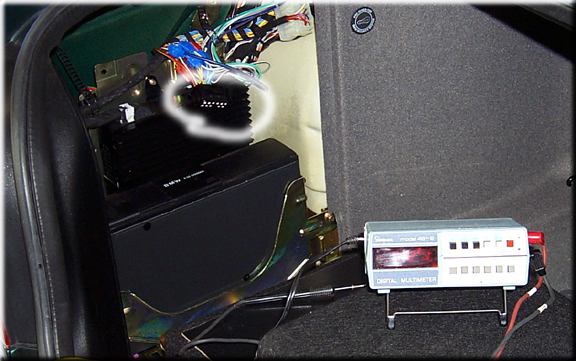
Volt/Ohm/Meter Test
(test your wires for continuity)
Example: Connect one probe from your VOM meter into pin 5 of your "12 pin connector" then connect the other probe to the violet + connector. Your meter should zero out. My wires passed with flying colors. (no pun intended)
You need to continue this process with all speakers wires then test the remote turn-on wire to complete your continuity test.
Congratulations! Now you're almost done...
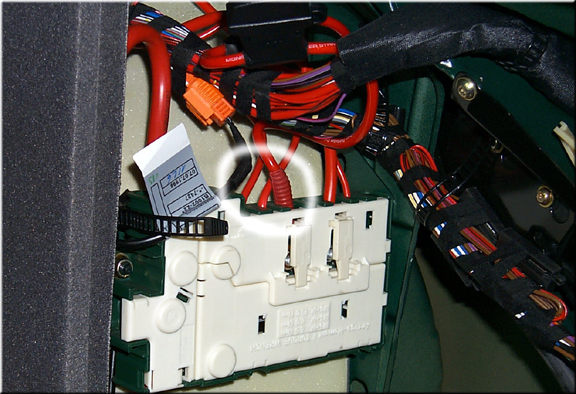
Power & Ground
Ah yes, owning a BMW is cool! The power panel is nicely laid out so tapping a new connection is a piece of cake. I also added an additional 20amp fuse between the power panel and subwoofer amp (handy for final step - just plug in the fuse and you're done). If you look closely above the circle in the photo you'll see the fuse holder.
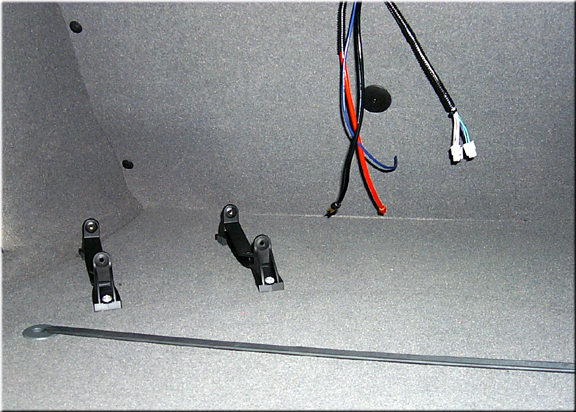
Mounting Brackets
(Final Stage)
Well, lets see by now you should have your subwoofer speaker wires and remote on wire routed, terminated, and tested. Power cable terminated at each end and ground wire terminated to the car chassis. Good now the mechanical stuff...
Go ahead and mount your subwoofer brackets into place. As you can see I have opted for a vertical corner mount option.
Final Result
Now all you need to do is tweak it to your tonal preference. You will notice instant improvement of your standard non-dsp sound system.
Next.... Upgrade all speakers... :-)