Okay, so heres
the deal. I didn't get the nickname McGuyver for nothing....
I was thinking to myself, what makes Dinan ot A'thority so special that they
can build a CAI and I can't? The answer? Nothing. So I decided to build my own
and save a few (hundred) bucks. Nothing against Dinan or A'thority, but I just
wanted to see if I could do this my self. I've had a couple glasses of wine
so I'll go into details in the morning. I'll supply a complete list of parts,
details and procedures tomorrow after I get a chance to do an official Butt-Tech
dyno test on the new system. Untill then, here's a link to some pics!
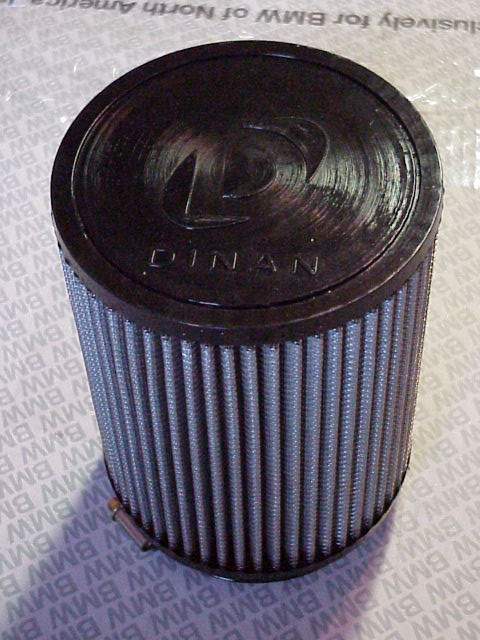
The most expensive piece of the system was the $54 filter element from Dinan. I probably could have gotten it for 1/2 the price from K&N directly, but I didn't have the patience (2 days express amil) and it wouldn't have had a cool Dinan logo on it....
Details to come..
R
No Butt Dyno yet but here's the details on the parts and costs. As some of you
mah have guessed the "HD" in HD Technik is Home Depot.
(I actually got the parth at OSH (Archard Supply Hardware) but HD sounded better
and would probably save a do it yourselfer a couple more bucks. I just live
closer to OSH. Okay so the parts list:
Dinan cylindrical
air filter element $50
Rustoleum American Accent Metallic spray pain $2.99
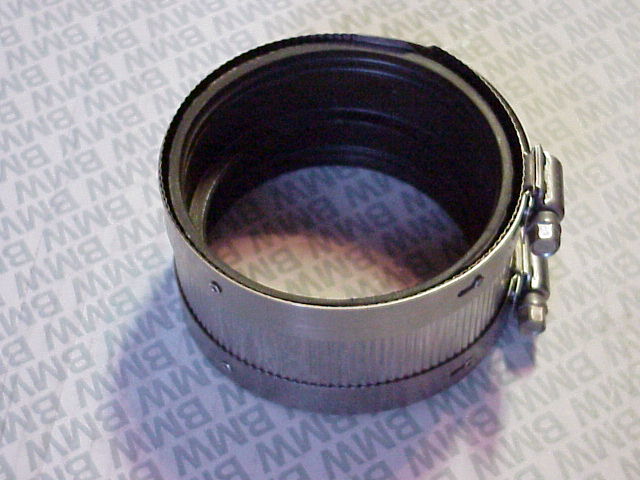
3" no hub coupling $3.99
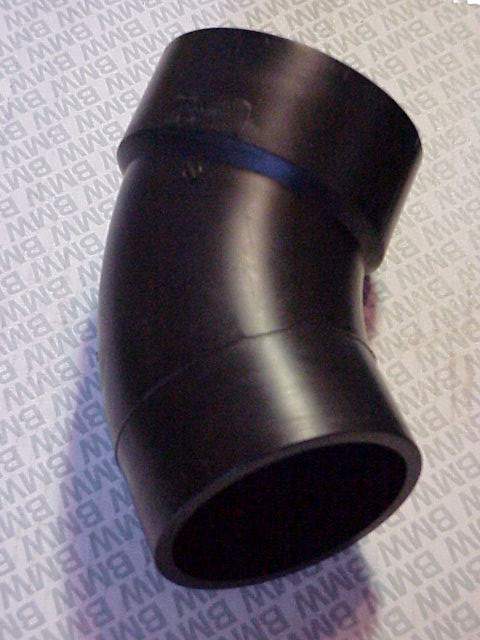
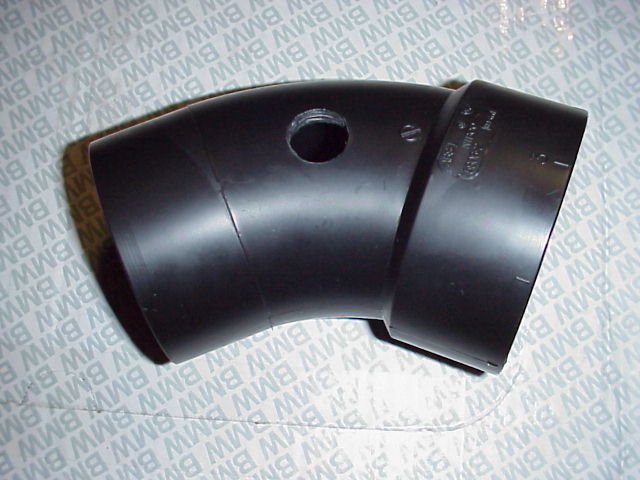
1/8 bend ABS long sweep spigot and hub $3.29
A dab of silicone (already had that)
The beauty of the spigot and hub is that the skinny end, or spigot is almost the EXACT same diameter as the mass air flow sensor -- and the hub end is the EXACT diameter as the inlet on the Dinan filter. This made it WAY too easy.
So, what I did was remove the stock airbox but leave the piping intake inside the fender in place to continue to route cold air into the engine bay.
On the pipe you can see a casting that looks like a round dot right about in the middle of the pipe. On the backside of the pipe I groung that flat and sanded it. This is where the air sensor hook up will be.
Then I drilled a 1/2 inch hole dead cente in that flat spot.
Now comes the spray paint. you could pretty mych do any color you wanted, but I wanted a color that matched the metallic tones already in the engine bay. 4 very carefully applied coats later, I mounted the air sensor.
It was a perfect and tight fit with the little green O-ring on the sensor. Then to make sure nothing would jiggle loose, a dab of silicone was applied to the edge where the plastic of the sensor butts up against the pipe.
The next step was to mount the filter to the pipe. This was not difficult. :-)
The next step was the 3" coupling to connect the pipe and the mass airflow sensor. 3" is actually a misnomer as the pipe and the airflow meter have a OD (outside diameter of approx. 3.5") but that's what they call it because it' s designed to connect pipe with a 3" ID (inside diameter).
Then I attached the filter/pipe/sensor assembly to the airflow meter and tightend down all the hose clamps, reconncted the wire harness on the sensor and presto.
That's it! The whole project took about 4 hours including the trip to dinan to pick up the fiter, the trip to osh, and waiting for the paint to dry...so to speak.. :-)
The removal of the factory airbox and the installation of the new intake took about 20 minutes. Next week I'm taking the setup to an automotive performance fabrication shop as a prototype to see what it would cost to reproduce as a kit in stainless steel. Would anyone be interested??? It would be one of only 3 CAI's available for the 540! And that's omly after A'thority officially releases theirs.
Cheers and happy McGuyvering!!!!
I think I'll take the LOOOOOOOOOOOOONG way to work today! :-)
R
HD Technik Intake (version 2) by Zebra
The motivation behind this project is the extreme disgust that I have about the obscene price gouging that is occuring by makers of the various cold air intakes (CAIs) for the E39 5er, the biggest offender being Dinan. The only components the Dinan kit includes are an aluminum (or carbon fiber for more $$$) tube, rubber coupling, bracket and filter, all for the not so appealing price of $500. To me this is plain ludicrous, so I decided to simply fabricate my own for the grand sum of $60. I credit the original design of this home made intake to The Artist and based my design on his with the only modification being a temperature sensor fitting which I will explain later. I feel that anyone will basic fabrication skills should be able to make a similar setup with out too much trouble and only spend about $60 in the process.
The theory behind the CAI
The main goal of any aftermarket intake system is to help the engine breath better by eliminating the often restrictive factory airbox. The general goal is to increase the peak airflow of fresh, cool air as much as possible. On the E39, the factory intake consists of a rather large airbox (IMO) connected to an intake tube that snakes it's way to the inlet in front of the radiator. I feel the factory airbox is actually adequately sized, but by coupling it to the snake-like intake tube, overall airflow is compromised. By replacing the airbox assembly with and open element filter, peak intake airflow is increased, thereby increasing power and the choked sound of the stock intake is replaced by a meaty growl under acceleration. With the general theory explained, it's time to see how it all comes together.
Construction
The HD Technik intake (so named because most of the components cam from Home Depot) consists of the following parts:
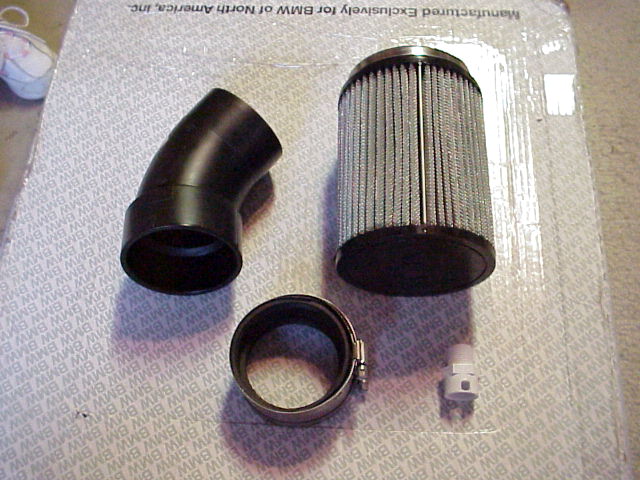
-Open element K&N style filter with ~4" inlet. Mine was purchased from a BMW dealership for $50 and has a nifty Dinan logo on it.
-1/8" bend ABS long sweep spigot and hub $3.00
-3" no hub coupling $4.00
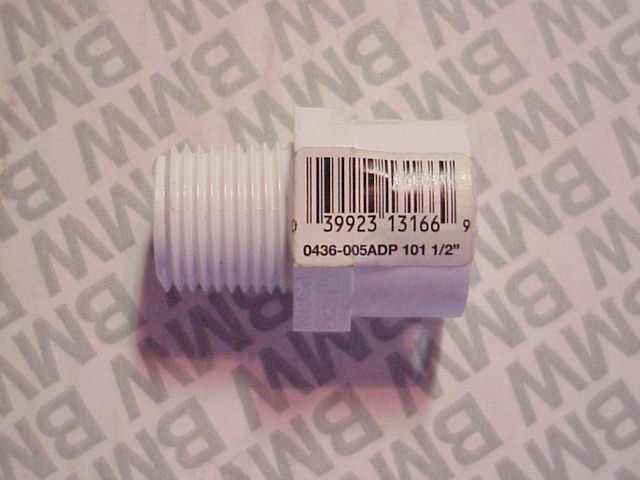
-1/2" Pipe fitting $1.00
-Spray paint of the desired color $2.00
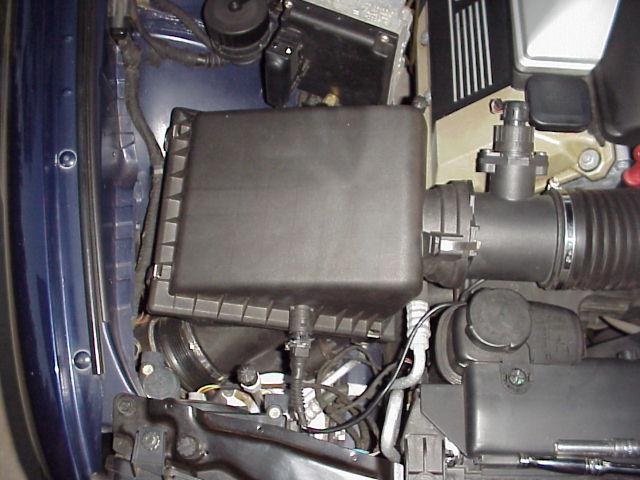
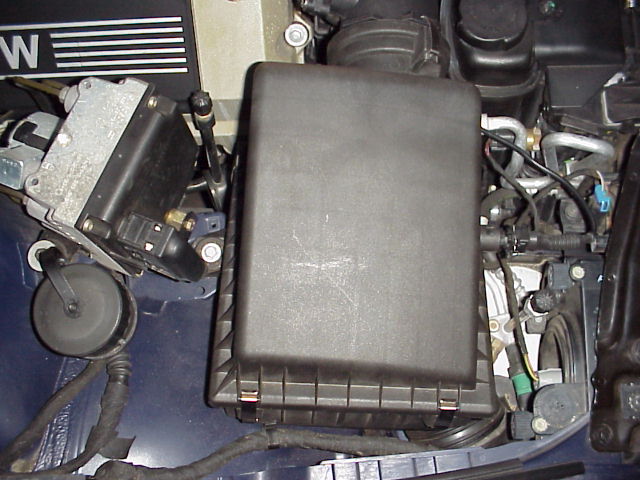
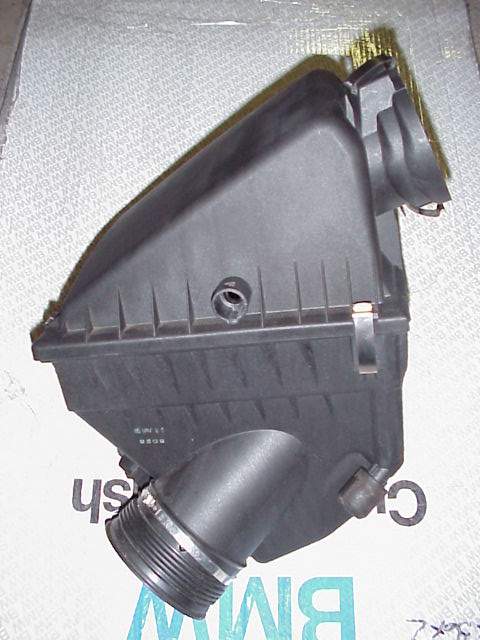
Step 1: Remove the stock airbox by removing the clips that hold it to the airflow meter, the temperature sensor and the single bolt at the back. The airbox should now lift out. Here are some pictures of the airbox in and out of the car.

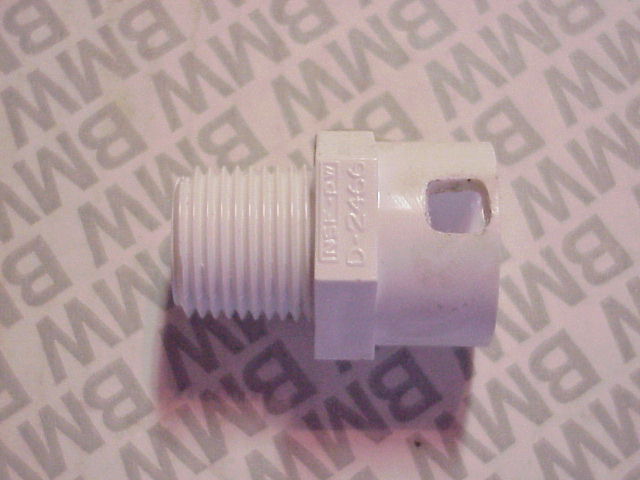
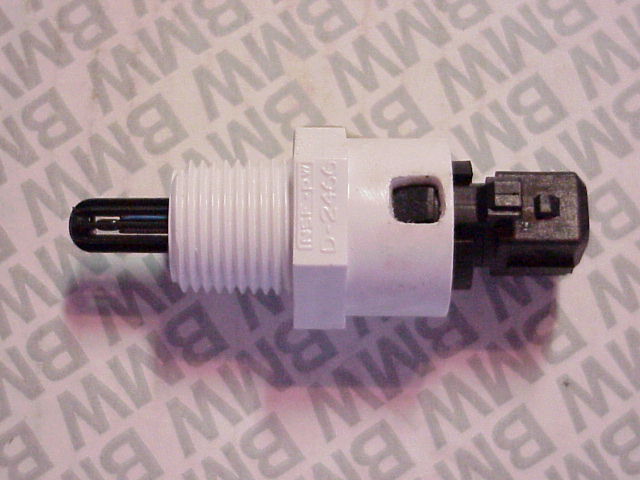
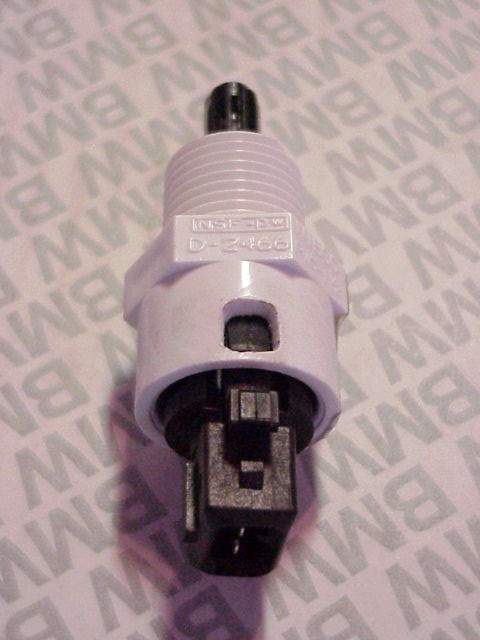
Step 2: The major change I made to this intake is the addition of the 1/2 fitting for the temperature sensor. I really did not like the ideal of simply sticking the sensor in a hole drilled in the pipe like others did and I found that the temperature sensor fits perfectly inside the fitting. After carving out a small square hole in the fitting, the sensors is retained exactly like in the factory airbox. Here are pictures of the modified fitting with the sensor installed.
Step 3: Now that the temperature sensor fitting is finished, a hole is needed in the main pipe to screw it into. The fitting is 1/2", so A slightly smaller hole should be made to accomodate it. I decided to place the hole on the back of the pipe. The fitting uses the same thread as on a shower head, so that is what I used to make the threads in the pipe and then screwed the fitting into it after appying teflon tape to ensure a tight seal. Here are pictures of the pipe before and after modification.
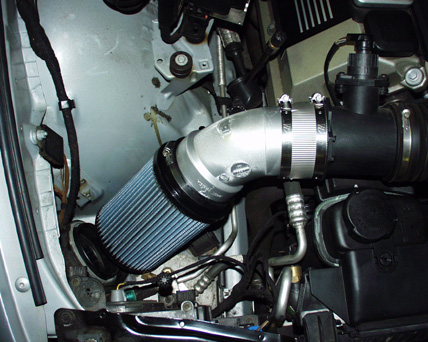
Step 4: At this point all the fabrication is done and the assembly can be cleaned and painted the desired color. When it dries all that is left is to put the filter on the end of the pipe and the coupling on the other end and to attach the whole assemble to the airflow meter and tighten the bolts. The coupling may be difficult to get on at first: just keep working it on until it is seated. Here are some pictures of the installed (and unpainted) unit.
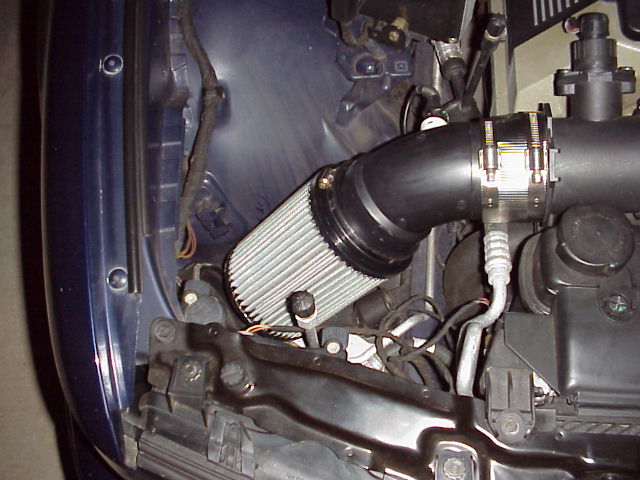
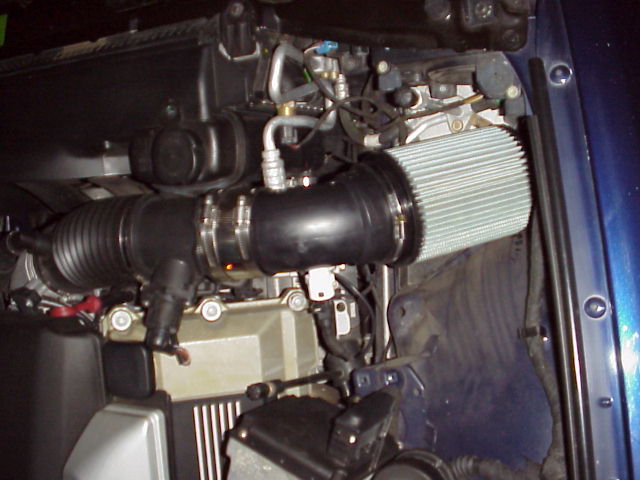
Initial Impressions: Right away I noticed a much healthier sounding intake sound with a throaty growl replacing the previous wheezing. The car seems to have more power sooner in the powerband. Overall, I highly recommend this simple and inexpensive modification. In the near future I will be looking into relocating the filter assembly into the wheelwell area ala Dinan and reporting the results.
Happy Motoring!
-Chris